
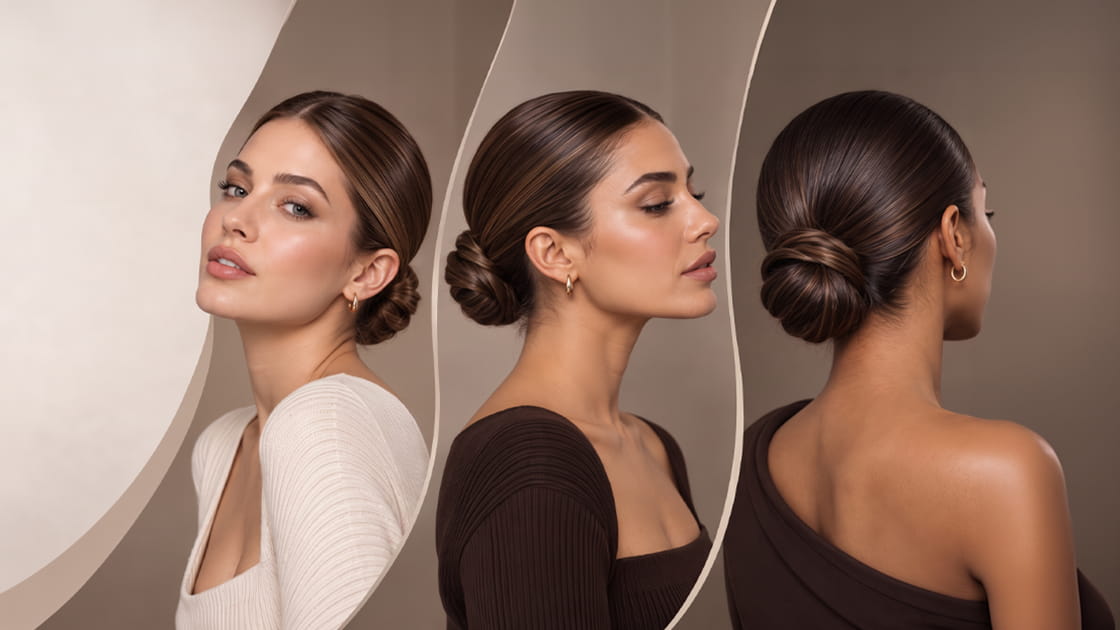
The sleek bun-where the hair is neatly combed back, stray strands are tamed, and the bun looks neat and put-together-can be created at home with just a few basic supplies. To ensure the style looks clean, it’s important to adjust the direction of brushing, the amount of product used, and the way the hair is gathered-rather than coating the hair with too much product. The basic principle remains the same for buns created at the nape of the neck or higher: First, the surface is smoothed out; then, the hair is gathered and the bun is secured.
Creating a successful sleek bun starts with preparation tailored to the length and thickness of your hair. While gentle styling may be sufficient for fine hair, working in sections provides more controlled results for thick hair. You can achieve a neat look without pulling the hair too tightly. By using the right brush, the appropriate hair tie, and the right balance of styling products, you can create a style that works for both everyday looks and special occasions.
WHAT IS A SLEEK BUN, AND WHAT KIND OF LOOK DOES IT CREATE?
A sleek bun is a hairstyle in which the hair is neatly combed around the head and gathered into a compact bun. Unlike a messy bun, the goal is to minimize volume and prominent protrusions on the surface. The hair can be pulled back from the center, the side, or without a part. The look does not have to be completely wet; depending on the finish of the product used, it can be styled to appear natural, slightly shiny, or with a more pronounced shine.
This style leaves the face uncovered and ensures the hair looks neat. Styling at the nape of the neck creates a simpler look, while the bun formed higher up creates a different silhouette. However, it is not necessary to pull the roots tightly to ensure the hair lies smoothly. The goal is to coordinate the combing and gathering stages. The key factors that define a sleek bun look are an evenly combed hair surface and ends that do not stick out.
WHAT PRODUCTS AND MATERIALS DO YOU NEED TO CREATE A SLEEK BUN?
Essential supplies include a fine-toothed comb to define the part, a dense-bristled brush to smooth the surface, an elastic band to hold the hair in place, and bobby pins to secure the bun. Choosing an elastic band that matches the thickness of your hair helps prevent it from slipping while styling. A small hairbrush can also be used to tame short strands. Wax or gel, chosen based on the hair’s texture, can help style the strands on the surface in the same direction.
When choosing a product, consider not only its holding power but also the finish you want and whether your hair tends to get weighed down easily. When selecting from Morfose’s hair styling products, you can follow the usage instructions on the packaging. Hair sprays used in the final step can be considered to help maintain the style’s shape. Instead of applying multiple products in large amounts one after another, it’s a more controlled method to start with a small amount and add more to the areas that need it.
HOW DO YOU PREPARE YOUR HAIR BEFORE A SLEEK BUN?
Before styling your hair, gently detangle it starting from the ends, then comb from the roots to the ends. If you’re working with freshly washed hair, remove excess water; make sure your hair isn’t completely soaked or heavy. Check the instructions for the styling product you’re using to see whether it should be applied to dry or damp hair. A clean slate makes styling easier, as any buildup of old product on the surface can make it harder for the new product to distribute evenly.
At this stage, determining the part and the position of the bun reduces the need to restyle the hair in later steps. To create a center part, use a fine-toothed comb to define the line; if you don’t want a part, sweep all the hair back. With wavy or curly hair, it’s not necessary to straighten the entire length. It may be sufficient to style the hair around the head in small sections. Dividing the hair into sections rather than pulling it all at once improves control during the styling process.
HOW TO CREATE A SLEEK BUN, STEP BY STEP?
Start by directing the front and side sections of your hair toward the chosen bun position. Use a small amount of styling product and distribute it evenly over the surface. Then, gather all of your hair in your palm and use a brush to smooth out any visible bumps. Check the front, side, and back views before securing the bun with an elastic. Making sure the hair gathered at the nape of the neck is brushed in the same direction ensures a result that’s just as neat as the top section.
Once the ponytail is ready, twist the strands around themselves and wrap them around the base, then tuck the ends under the bun. Secure the bobby pins not only to the outer strands but also so that they hold the bun and the base together. You can check the stability of the style by gently moving your head. When adjusting a loose section, secure only the specific spot instead of re-tightening the entire hairstyle. This makes it easier to maintain both the shape of the bun and the neatness of the hair’s surface.
HOW DO YOU BRUSH YOUR HAIR AND STYLE IT INTO A PONYTAIL FOR A SLEEK BUN?
First, comb the top section of your hair, then the sides and the back toward the gathering point. Hold the hair in place with one hand while smoothing the surface with the other. For thick or voluminous hair, work in small sections. Wrap the elastic around the ponytail just enough to keep it from slipping; don’t pull it too tight, as this will make it look neater. After tying it, if there are any bumps on the surface, gently smooth them out with a brush. If a large bump has formed, instead of tugging at the hair, loosen the elastic and comb that section again.
HOW DO YOU STYLE A SLEEK BUN AND SECURE IT WITH A HAIRPIN?
Gently twist the ponytail and wrap it around the elastic band in the direction your hair naturally falls. After tucking the ends under the bun, secure it at the base by threading bobby pins through different points. Instead of putting all the weight on a single hairpin, distribute the weight across several points. For long or thick hair, position the bun evenly without squeezing it too tightly. If the ends of the hairpins are pressing against your scalp, adjust their position; don’t try to maintain an uncomfortable placement just to keep the bun secure.
HOW DO YOU STRAIGHTEN SHORT, FLY-AWAY HAIR WHEN CREATING A SLEEK BUN?
Use a small brush to tidy up any stray strands around the forehead, temples, or nape of the neck. Instead of reapplying the styling product to the entire head, apply only a small amount to the areas that need it. Move the brush gently in the direction the hair is gathered. Don’t pull on the short strands to force them to blend with the longer ones. For strands at the nape of the neck that don’t reach the bun, securing them with a small hair clip may be more practical than repeatedly adding more product.
In these areas, you may want to consider using wax or gel for precise application. Follow the recommended application method for the product you’ve chosen and check the appearance after the first pass. Excess product can lead to noticeable buildup along the hairline or clumping of strands. Short strands that are lightly adjusted can blend in with the overall style; it’s not necessary for every strand to be completely invisible. Preserving the natural hairline while styling the hair around it yields a more balanced result.
WHAT SHOULD YOU DO TO MAKE YOUR SLEEK BUN LAST ALL DAY?
The durability of the style depends not only on the product applied to the surface but also on the proper placement of the elastic and hairpins. If the base of the bun remains loose, the style may slip down over time, even if the outer surface looks smooth. During the final check, make sure the elastic is secure, the ends are tucked in, and the hairpins distribute the weight evenly. Apply the adhesive in small amounts at the distance specified on the packaging. Ensure an even distribution across the surface rather than saturating a single spot.
Frequently touching your hair throughout the day or constantly tugging at your bun can cause the styled strands to come loose. If there’s a minor issue, first adjust any loose hairpins or stray strands; consider reapplying product to the entire style only as a last resort. Keep in mind that the look may change under conditions such as vigorous movement, wind, and humidity. Instead of expecting the style to stay the same all day, making small adjustments where needed helps maintain a neater look without letting it get too messy.
WHAT MISTAKES SHOULD YOU AVOID WHEN STYLING A SLEEK BUN?
The most common application mistakes include using too much product, gathering the hair before untangling it, and tightening the hair tie too much in an effort to achieve a smooth look. Applying the styling product heavily to a single area can create an uneven appearance on the surface. Hairpins that hold the bun only from the outer layer may also fail to provide sufficient support. Establishing the combing pattern first, then adding small amounts of product, and finally checking the hold provides a more balanced application sequence.
Avoid pulling your hair too hard while it’s completely wet, pressing the clips against your scalp, and constantly pulling on loose sections to adjust them. If you feel discomfort while wearing it, loosen the elastic or adjust the position of the bun. When taking the style down at the end of the day, first remove the hairpins, then gently untangle the elastic from the hair. Instead of forcefully brushing through tangled strands, follow the product’s cleaning instructions.