
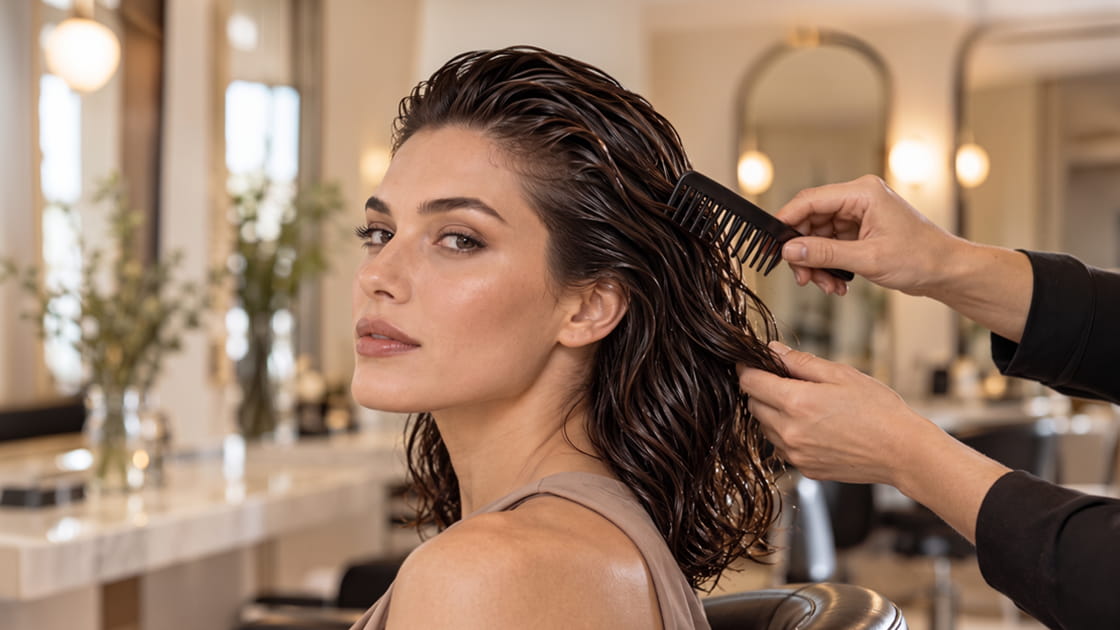
Lightly dampening the hair, evenly applying a styling product with a glossy finish, and positioning the strands in the desired direction are the basic steps for a wet-look hairstyle. For this look, the hair doesn’t need to stay constantly wet. The goal is to create shine and defined strands that make the hair look moist even after it dries. You can choose either a sleek, back-combed style or a more dynamic look that highlights natural waves.
Achieving a successful wet hair look depends on finding the right amount of product for your hair type rather than using too much. While a light application may be sufficient for fine hair, thick hair requires dividing the hair into small sections to distribute the product evenly. When the preparation, styling, and setting stages are carried out with care, it becomes easier to achieve a defined and shiny result without weighing down the entire head of hair.
What Products and Supplies Are Needed for a Wet Hair Look?
To create a wet look, all you need is a styling product with a glossy finish, a comb, hair-separating clips, and a soft towel to blot away excess water. Gel is a good choice for creating defined, controlled sections. Those who want to preserve their waves may want to consider hair mousse options. However, not every product provides the same level of shine; be sure to check the finish and hold information on the packaging.
When choosing from Morfose hair styling products, you can focus not only on hold but also on the texture you want to achieve. Formulas designed to create a shiny or wet look are better suited for this style than those with a matte finish. A fine-toothed comb creates clean lines, while a wide-toothed comb separates strands more naturally. Instead of using all the products at once, start with a basic styling product-this makes it easier to adjust the amount.
Should a Wet Hair Style Be Applied to Damp or Dry Hair?
In most cases, it’s easier to start with slightly damp hair; however, always follow the product’s instructions. Water should not be dripping from your hair, and excess moisture should be removed with a towel. If your hair is too wet, the styling product may become diluted and pool in certain areas, which could prevent the desired hold from forming as your hair dries. Gently squeezing the hair dry with a towel, rather than rubbing it vigorously, helps prevent unnecessary frizz on the surface before styling.
If you’re working with dry hair, instead of washing the entire head of hair again, you can lightly dampen the sections you’ll be styling with water. This method makes it easier to distribute the product, especially on the front and sides. If there are residues from previously applied heavy products, starting with a clean slate yields neater results. The hair’s moisture level should be consistent across all areas; if the front is too wet and the back remains dry, the texture of the style may not look even.
How to Style Wet Hair at Home, Step by Step?
First, gently detangle your slightly damp hair and define the part. Next, divide your hair into front, side, and back sections to decide where to concentrate the shine. You can either sweep just the top sections back or extend the look down the lengths. Making this decision before applying the product helps prevent over-application in certain areas and reduces the need to work on the same strands repeatedly during styling.
After applying the styling product in small amounts, style the sections in the direction of your choice and check the sides and back in the mirror. If there are noticeable gaps or areas where the product is too concentrated, correct them before the product dries. Afterward, let the style set rather than constantly combing through your hair. If you need to blow-dry it, use low-speed air according to the product’s instructions; a strong airflow can disrupt the style you’ve created, especially at the front.
How Do You Apply Styling Product to Your Hair for a Wet Look?
Rub a small amount between your palms to create a thin layer. Instead of applying the product directly to the scalp, distribute it over and between the sections of hair you’ll be styling. Start with a small amount, then add more to the areas that need it. If your hair is long, work in small sections; applying the product only to the surface may cause the lower sections to look dry and frizzy.
How Do You Style Wet Hair?
To achieve a neat style, comb your hair back or toward your chosen part; do not pull too hard at the roots. If you want a more natural look, use your fingers to separate and arrange the strands. For wavy and curly hair, gently scrunch the strands from the bottom up. Finishing the final touches before the product dries prevents the visible comb marks from blending with the natural texture.
How to Achieve a Wet Look Based on Hair Length and Texture?
For short hair, it’s usually enough to apply the styling product in small amounts and use your fingers to direct the style. For medium-length hair, working on the front and side sections separately allows for more controlled styling. For long hair, you can apply the product just near the roots to add shine, or work it through the lengths. If you want a style that’s sleek on top and more dynamic at the ends, limit the application area rather than covering the entire head with the same intensity.
Since too much volume can quickly flatten fine hair, work with light layers. For thick hair, work in smaller sections to ensure even distribution. For wavy and curly hair, if you want to preserve the natural shape, opt for styling with your fingers rather than heavy brushing. This way, wet-look hair can be styled according to the person’s natural texture and desired volume without forcing it into a single mold, regardless of hair type.
How Can You Maintain the Wet Hair Look All Day Long?
To ensure the style lasts longer, handle your hair as little as possible after styling is complete. Constantly running your fingers through your hair can cause strands to separate and disrupt the setting layer. Frequently tucking your hair behind your ears or pressing it down with a tight accessory can also alter the created style. Since longevity varies depending on the formula used, the hair’s texture, moisture levels, and amount of movement, the same duration should not be expected for everyone.
If additional hold is needed, hairspray can be used during the finishing stage; adjust the application distance and amount according to the product’s instructions. Hair spray should be used to support the desired style rather than to create a wet look on its own. If a small section loses its shape during the day, instead of re-wetting your entire hair, simply smooth out that area with slightly damp fingers. Continuously adding new layers over dried product can lead to buildup and visible residue.
How Can You Prevent Your Hair From Looking Greasy and Stiff in a Wet Hairstyle?
To maintain the balance between shine and a greasy appearance, gradually increase the amount of product you use. Applying the product heavily to the roots and layering different concentrated formulas on top of each other can weigh down the strands and cause them to stick together. Start by creating a thin layer on the surface of the hair, then fill in any missed areas. Especially with fine hair, focusing on the front and top sections rather than covering the entire length can yield more balanced results.
As hold increases, it’s normal for some formulas to develop a stiff texture; if you want a more flexible result, choose your product accordingly. Brushing dry hair vigorously can leave white residue on the surface, so complete any touch-ups during the styling phase. If you’ve applied too much product, don’t add new layers; if necessary, clean the hair and restyle it with a smaller amount. The goal is not to coat the hair with a thick layer, but to create a controlled shine that maintains the chosen style.